Introduction to Machine Learning
Introduction
In this series, I am presenting to you, the hottest topic of this era, Machine Learning. Throughout this series, you will be starting from scratch, and slowly learn from basic to advanced algorithms of Machine Learning. We will walk you through a lot of popular Machine Learning frameworks like NumPy, Scikit-learn, TensorFlow, Keras, etc. So get ready to start your awesome ride to the world where Computers (Machines) are treated as children and we teach them many things with real-world data.
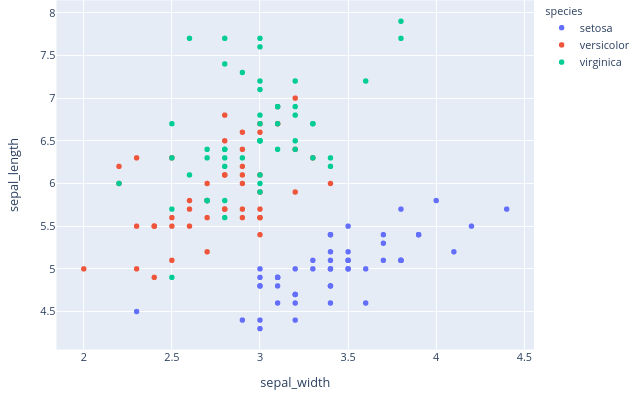
We will also learn how to understand and manipulate data. I will put effort on creating complete pipeline for your data from preprocessing to model evaluation. After this series, you can do extensive exploratory data analysis to understand and present different summary and visualization of data like a chart given below:
What is Machine Learning?
Whenever people think of Machine Learning, they imagine a robot who looks very similar to a human and act like a human. It has its own heart and mind, can take decisions, and be intelligent. But actually, machine learning is not necessarily a robot/agent. It can be any device or even only software with no hardware tools (we will mostly build a machine learning algorithm/software in this series). The special characteristic of Machine Learning-based software is that it can react to new kinds of inputs and give output based on that new inputs or instructions.
In a typical programming world, we create an application with a programming language, using different kinds of logic like conditionals, loops, etc. In traditional programming, we give the program a set of formulas or rules, so it can take a limited set of inputs and give a set of fixed outputs. Programming a machine learning algorithm is slightly different from traditional programming. In Machine Learning, we provide a program a set of inputs (and probably their outputs) and expect that it will work on a new set of inputs (that is never seen or expected by the program). When a program can look at data, and then become able to analyze a new set of data, it is Machine Learning.

According to Wikipedia:
Machine learning (ML) is the study of computer algorithms that improve automatically through experience and by the use of data.
So like the above image, you do not need to code the rules of adding two numbers. You can only provide a bunch of examples for addition (e.g. 1+2=3, 4+3=7 etc.), and the program will learn how to do addition by itself!
Prerequisites
What do you need before getting started with this Machine Learning series? You can do ML with any programming language. Most of the programming languages have frameworks/libraries for machine learning. But the most popular ones right now are Python and R programming languages. For this series, we will go with Python because it is used more than R.
Moreover, you will need to know Math. Specifically, to understand the core concepts of Machine Learning like gradient descent algorithm, forward feeding, and backpropagation algorithm, you will need to know Calculus. But for the sake of simplicity, generality, and most importantly fun, we will try to remove most of the underlying concepts of ML, and focus on the application and usage of pre-built ML algorithms. So do not worry about math too much if you don’t want it right now.
Applications of Machine Learning
1. Product Recommendations: Currently the most widely used application of ML is recommendation systems. Almost every big tech company uses this for their product advertisements.
2.Image Recognition: Did you ever think that computers will be able to understand scenery? Now it can identify each object of a scene and make decisions just like humans.
3.Speech Recognition: Ever wondered how your smartphone assistant (Siri, Google Assistant, Alexa) can understand your speaking and talk to you? It is also an application of ML. More specifically, machine learning algorithms with sequential data handling capabilities can work for speech recognition and synthesis.
4. Self Driving Car: Self Driving Car will be the future. To make it happen, a collaboration from Image Recognition to Pathfinding and decisions making. All of these are possible with the help of ML.
5. Fraud Detection: ML can easily detect outliers from your data. Using online fraud detection, many bank transaction systems can be kept safe. We will learn how to detect outliers in your data and preprocess it so your data becomes clean.
6. Image synthesis: ML can be used to generate new images from existing images. With the help of Generative Adversarial Networks, all of these cartoon charters are generated.

7. Story Generation: Using advanced Natural Language Processing (NLP) techniques, now computers can create beautiful new stories that are very pleasing to hear.
8. Content writing assistant: Have you ever heard of the online tool Grammarly? It is a wonderful tool that helps you correct your spelling and grammar mistakes. It is solely based on NLP and Machine Learning.
9. Translation: People now can understand any language with the help of their smartphones. This is also possible because of text translation with Machine Learning. Now you can just hold your camera to a foreign-language sign, and it will capture the sign, convert it into text and then translate it for you. We will have a look at OCR in one of our upcoming lessons.
10. Streaming Video Compression: Last but not least, with machine learning high-quality video conferencing is possible. An HD web camera can produce up to 1 Gigabyte of data within seconds. Imagine how much data is needed to be passed through the internet when you are sitting in an online class with 30 more students. But you are getting high-quality video because, with ML, the video is being compressed to kilobytes and then sent through the internet. Image, Audio, and Video compression are also done with ML nowadays.
Brief overview of Python
If you think that you became rusty in python, or don’t have the confidence to go deep into ML without sharpening your python skills, here I will cover the fundamentals of python. You can skip this section if you are confident enough. Below are the top things of python we will need throughout the series:
Importing
As said previously, we will be using a lot of libraries for ML. So we start with importing all those libraries. In python, it is always good practice to import all the required libraries at the top of the .py file.
| |
You can install new libraries through a package manager like pip or anaconda. For example, to install numpy, you simply type in the console:
| |
Stating Variables
Variables are placeholders for different kinds of values. Python is a dynamically typed language, which means one variable can be used to hold different types of values. Python has the following four primitive types for variables:
- Integer: An integer can hold a whole number. Python supports big integers by default, so you can keep as big an integer as you want in a variable.
- Float: A float is much like an integer, but holds a rational value.
- Bool: A Boolean value is a two-state value. True or False.
- Str: A String type holds characters or Unicode values.
Below is an example to use all the built-in types of variables:
| |
Operations
Below is a snippet that shows all common operations that can be done in python:
| |
Complex types
Besides the primitive types, python also has many classes predefined. Two of the most important classes among them are list and tuple. The type str discussed previously is also a subtype of the class list. The key difference among lists and tuples is that lists are mutable, and tuples are immutable. Here is a demonstration of both of them:
| |
Conditionals
Like all other programming languages, python has conditionals like the following:
| |
But unlike most languages, you can use short conditionals to get a value in one like
| |
Functions
Functions in python can receive several parameters and can return any value. They can also use variables declared in the global scope.
| |
Loops
The while loops in python are similar to all other programming languages:
| |
Python does not have a for loop with “initialization”, “condition” and “statement” like C, C++, Java, JS, and many other languages. The only way for loops in python to work is through a list or generator. Let us look at a list first.
| |
Generators
Python has a special kind of data type named generator. A generator is like a function but keeps its state after returning something to resume execution for consecutive calls. Let us create a generator that yields ints from a starting value to an ending value.
| |
Fortunately, Python provides a very helpful built-in generator function named range. It can be used to create many types of lists. Let us see some example:
| |
List comprehensions
Python has a list/tuple creator syntax, that can be used to create many complex types of lists with only one line. For this feature, python is known as ** one-liner programming language**.
| |
Pattern Matching feature
Python has an awesome pattern matching feature that can be used to save a lot of time and effort while creating efficient understandable code. Let us see a demonstration of pythons pattern matching:
| |
Here, the list three_numbers is expanded with the * operator, and then matched sequentially with a, b, and c. In future lessons, you will see a lot of functions like below:
| |
Here, args and kwargs are not any specific keywords. You can use any other name if you want. It is just used by convention. If a function can evolve over time (with different release versions of the library), it is a good idea to keep the args and kwargs so later we can get any parameters in the newer version without breaking backward compatibility.
Also, another example of using args is shown with the summing function.
| |
List slicing
We can slice a list/str pretty easily with the list slicing syntax. The syntax is like list[inclusive_start:exclusive_end:jump]. You will get the gist with the example below:
| |
Remember, these are the bare-bone basics of the wonderful python language. This will give you a quick start with python if you have programming knowledge with any other programming language or you think you need to sharpen the basics of python before this series. There are a lot more than just these with python. But with this given knowledge, a simple google search will help you understand easily if you encounter a new syntax.
Setting up the Machine Learning environment
Now that you have become more confident to work with python, let us set up the environment for all the upcoming lessons. The best practice to do data science in python is to use a version manager. You can use anything like Anaconda, Virtualenv, or even the built-in pip if you are comfortable with it. A version manager is necessary because you may need a specific version of python to do a specific experiment with a package. If you directly install python to your machine, then you will not be able to use separate versions for your different experiments.
Go ahead, download, and install Anaconda. If you are low on resources, you can try the miniconda. After installing, add the bin folder from the installed directory into your PATH variable. You can follow the official guide from Microsoft to do so. After adding to PATH, verify that you can use it in the CMD. Open a CMD and type:
| |
If the command works, you have successfully installed conda. Anaconda is a python environment manager. It can manage different python versions and their libraries separately in different environments. Let us now create a python environment using anaconda with python version 3.8.
| |
After that, you can activate the environment, so whenever you run a python file, it will be interpreted with the python interpreter from the newenv.
| |
Now write a python file with print('hello world') and save it as main.py. Then run it with python main.py (remember to activate the newenv environment). You can see that it works and the python version used will be the python in your environment. Finally, let us install some useful packages that we will use throughout all the upcoming lessons. Type the following command in CMD.
| |
Let us dissect the command part by part. The first word conda is the executable name. Then we specify a command install indicating conda that we want to install something. Then we provide an argument -n with the value newenv. -n newenv indicates that we want to install something into the environment newenv. After that, we provide three packages numpy, pandas, and jupyterlab. Press Y where necessary and you have installed 3 new packages into your environment named newenv. Let’s test those packages now.
Jupyterlab (or jupyter notebook) is an awesome tool for data science and machine learning enthusiasts. It gives you so much flexibility that you will not want to leave that soon. Activate the environment and open a jupyterlab instance from CMD.
| |
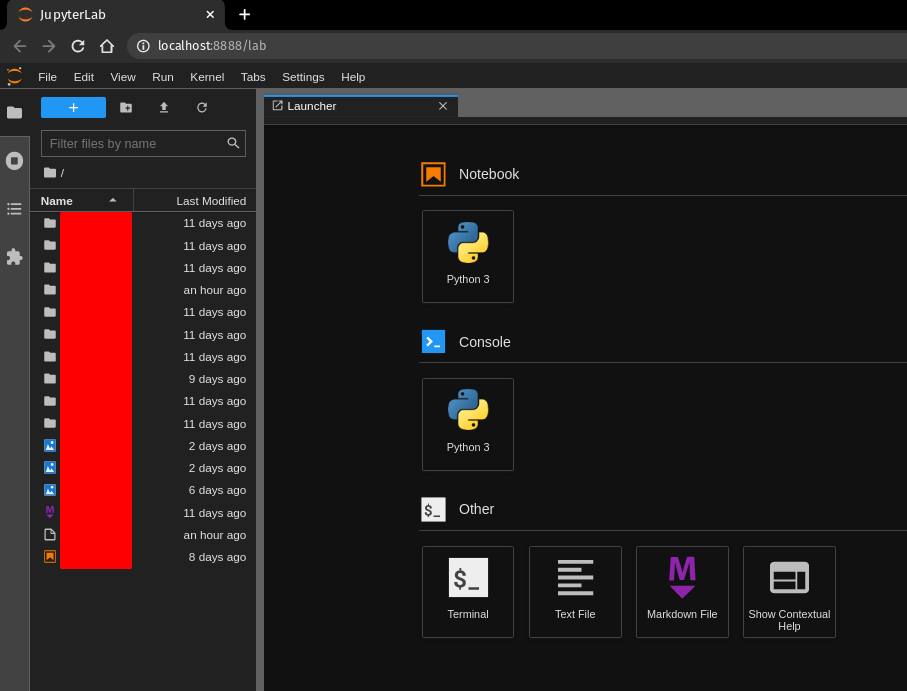
Your default browser will open with a localhost page like below:
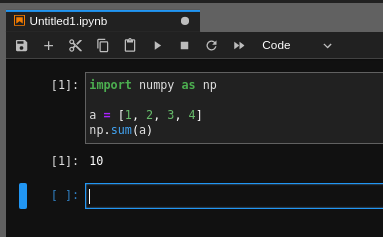
Press the “Python 3” button under the Notebook section and you will create a new notebook file in your current directory.
Now in the first cell, type the following python code:
| |
Then press Shift+Enter to run the cell. You will get the sum of the list, 10.
Now let us explain what you just did. Jupyterlab or Jupyter notebook creates python kernels that run for each notebook. Notebooks are file formats (written in JSON) that use python kernels to run. When you run a notebook cell in jupyter notebook, the state of the cell is saved in the python kernel. That means all the variables and functions declared there will be available throughout the notebook.
For the rest of the series, it is up to you to decide which method to use for your data science career. We will only discuss the python codes you need. You can run that code in a notebook or as a file.
Conclusion
In this lesson, we warmed up ourselves with python and set up our environment for Machine Learning. From the next lesson, we will step into the field of ML. Until then, I will recommend you to play around with python, anaconda, and jupyter notebook.
